Monday, 30 July 2012

Steamed eggplant with mayo-miso

Combining our Japanese study and our wish to try some new Japanese foods, we decided to study some Japanese cook books in the library! Ok, we will admit, sometimes the recipes were a little hard to follow/read, so we just use our own imagination and taste to complete the recipes and fill in the blanks :)

During this process of reading, and trying we have come to make some nice dishes of our own. This time we want to share a recipe that combines the joint love of the Dutch and Japanese for mayonnaise! While we Dutch are known for putting mayonnaise on everything, the Japanese also use it as topping on many recipes. (who would want to eat Okonomiyaki without mayonnaise??) This recipe is for steamed eggplant with a mayo-miso sauce! In the Japanese kitchen eggplant is combined with miso in a lot of recipes, but we liked this recipe for it's full, creamy taste the mayonnaise adds.


Ingredients (2p):
  • 1 (big) eggplant
  • 2 tbsp mayonnaise
  • 1 tbsp (red) miso paste
 Cut the eggplant is slices of around 1 cm thick. And steam the slices for about 10 - 15 minutes. (In our previous recipe we described how you can steam easily with just simple kitchen tools: pan with lid and a colander)

In the meanwhile, mix the mayonnaise and the miso paste. You might want to taste a bit and adjust the ratio to your preferred taste. Too much mayo can make the taste too fatty, but too much miso will make it too salty.

Put the steamed eggplant slices on a plate and add the mayo-miso sauce mix on top. Very easy, but tastes great!
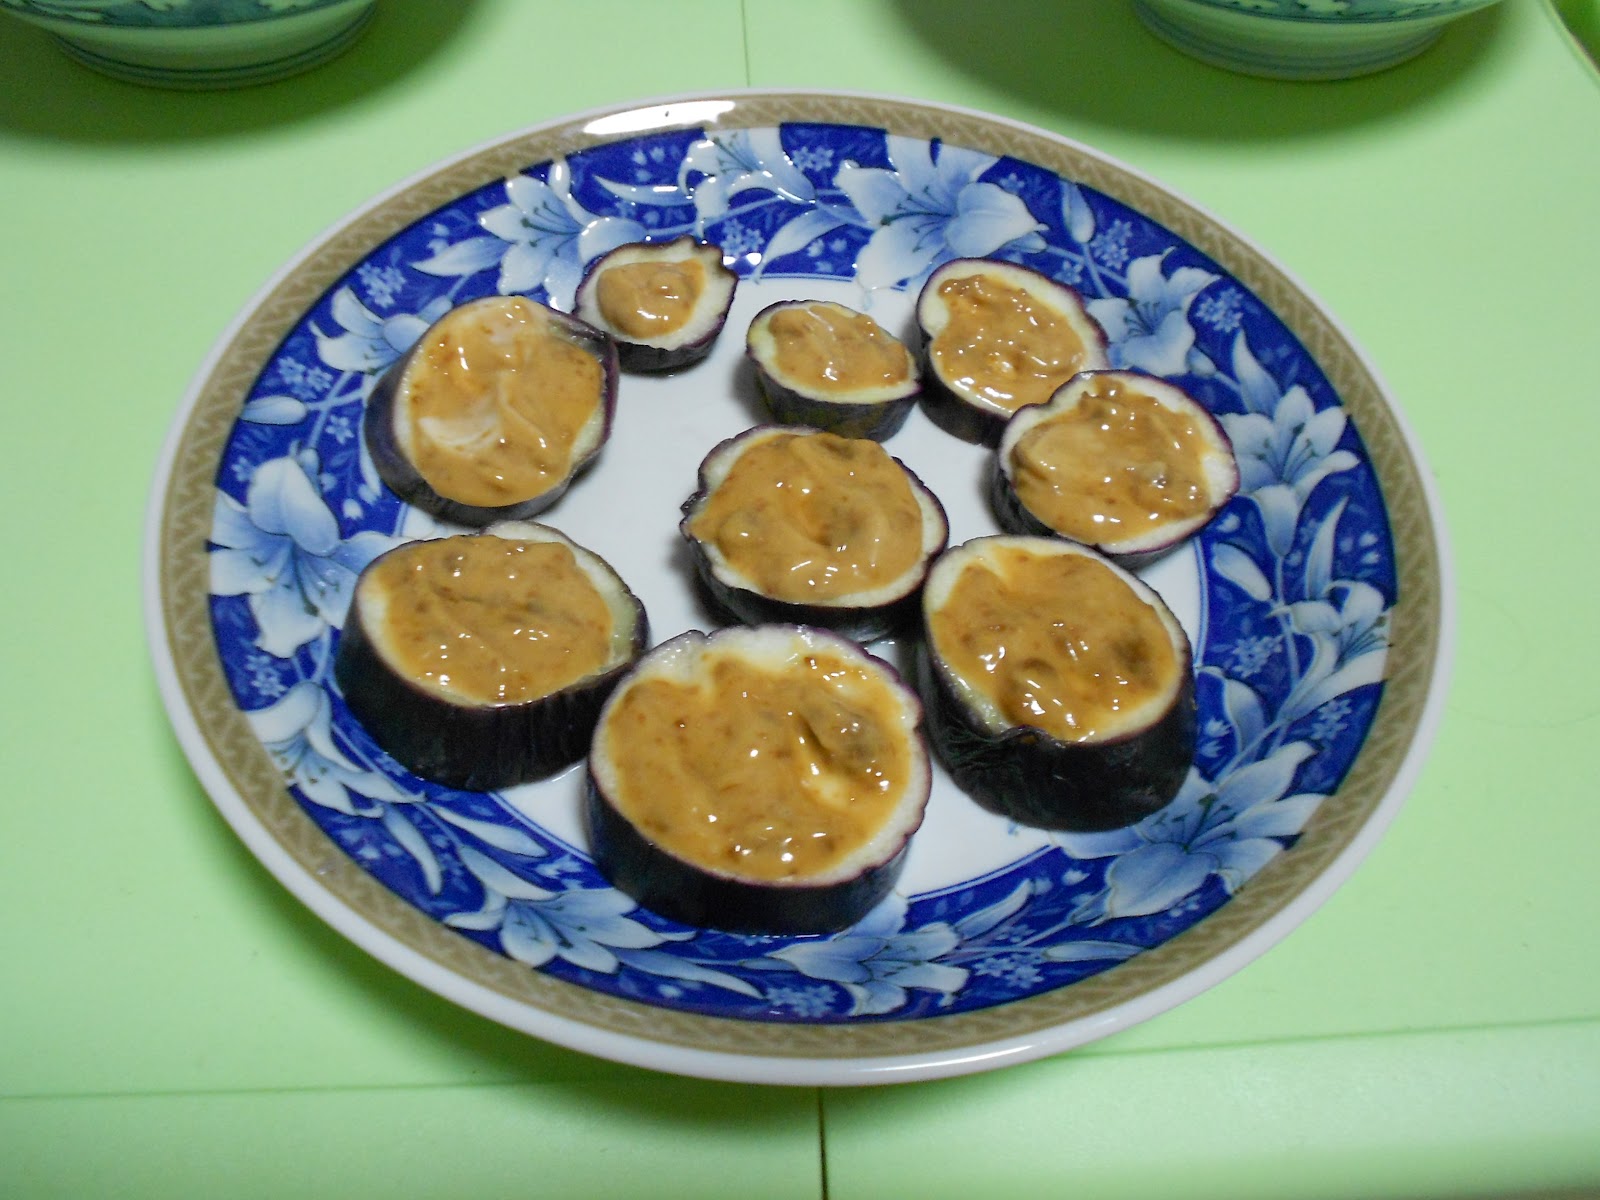
Steamed eggplant with mayonnaise and miso sauce


Friday, 27 July 2012

Steamed sweet potato, with banana and honey

Recently we posted a recipe with Satsuma-imo (Japanese sweet potato's) prepared in the rice cooker: Satsuma-imo gohan (or sweet potato rice). However, we found that Japanese sweet potato's can be prepared deliciously in many different ways. Because our local supermarket has recently had the Satsuma-imo on sale a couple of times we decided to try some other ways of preparing our favourite Japanese potato.

Today we want to share how to make steamed satsuma-imo, very easy but tastes very good and it is actually a very healthy way to prepare the sweet potato's (or food in general). This time we decided to mix the sweet potato with banana and honey, to complement the sweetness and give it a more fruity taste to make the satsuma-imo nice into a recipe for the summer!


Ingredients (2p):
  • 2 small satsuma-imo (or 1 big one)
  • 2 banana's
  • honey as a topping
  • rice for 2 persons
 We like to serve our steamed meal with rice, but if you prefer otherwise you can of course substitute the rice with anything you like. Otherwise, just cook the rise as usually.


Satsuma-imo, Japanese sweet potato
Cut the sweet potato into big pieces, you can make them around 3cm square. Steam the pieces for about 15 minutes.
We don't have any special steamer, so we just use simple basic kitchen tools: pan with lid and a colander with a diameter a little bigger than the pan (so you can hang the colander in the pan, without it touching the bottom). Put a little bit of water in the pan (around 1 cm), so that when you hang the colander in the pan it won't touch the water and bring to boil. Put the potato's in the colander and hang it in the pan, then place the lid on the pan. Then, all you have to do is wait 15 minutes (maybe check that the water isn't evaporated)

Cut the banana's in pieces and place together with the steamed potato on a plate. Add honey to taste, and mix all together. Serve with rice, and enjoy you sweet, fruity satsuma-imo dish!


Satsuma-imo, banana and honey


Saturday, 21 July 2012

Pumpkin (kabocha) cookies

This time we want to share a recipe that can be enjoyed in many different ways! It's nice to eat as a snack, a great taste and healthy cookie. But we also enjoy it very much to eat as a side dish in our bento boxes. Easy to make a bunch of cookies and then take them with you on several days.


Ingredients:
  • half Japanese pumpkin (we have never tried it with non-Japanese pumpkin, so we don't know if it will work just as good)
  • flower
  • topping: sesame seeds
Japanese pumpkin

Remove the seeds from the pumpkin (easily with a spoon), and cut them to small pieces. Let them cook for about 10 minutes.

Cut into pieces

Cooking
Put the cooked pumpkin pieces in a bowl and add the flower. You will need enough flower so that the flower mixed (smashed) together with the pumpkin will feel very soft and kneadable. We normally use around 7 (big) table spoons of flower to reach this. But you can just try and add more flower till you're satisfied with the result.

Cooked pumpkin

Result of mixing the cooked pumpkin pieces with flower
Then, make round flat shaped cookies from the pumpkin-flower mix. It will be much easier if you keep your hands wet, so it doesn't stick to your fingers to much. Add sesame seeds on top, and make sure stick to the cookie.

Put on over roster (maybe use a sheet of baking paper first!)
Put them in the oven, and bake them till they turn a little brown. In our oven, it takes approximately 10-15 minutes on 200 degrees C.
Baking the cookies
'How-to-make' video :)


 Let them cool down, and enjoy!


Monday, 9 July 2012

Satsuma-imo gohan (Sweet potato rice)

Our school has started again, so we spend our days in the classroom and/or in the library. This means that we normally don't have time to eat lunch at home. Therefore, we bought some nice lunch-chopsticks with holders, and have started making a lot of bento-meals. So, from now we will probably start sharing some of our favourite take-with-us recipes.

  Usually we prepare these meals before we go to school, so they have to be real easy and quick to make. This recipe, Satsuma-imo gohan or sweet potato rice, is exactly that. You only need a rice cooker and some time to wait until it is finished cooking.

Satsuma-imo are Japanese sweet potatoes, with a purple skin and yellow-ish inside. It has a really nice, sweet taste. We have even seen (and tasted) it as a ice cream flavour!

Japanese sweet potatoes (Satsuma-imo)


Ingredients (2p):
  • White rice for 2 persons
  • 2 average sized sweet potatoes
  • 3 tbsp mirin
  • topping: sesame seeds
We have seen recipes for this meal using different kinds of rice, but since we normally only have plain white style rice we just use that and it tastes good! However, for some variation in taste, you can try making it with (combinations of ) different kinds of rice.

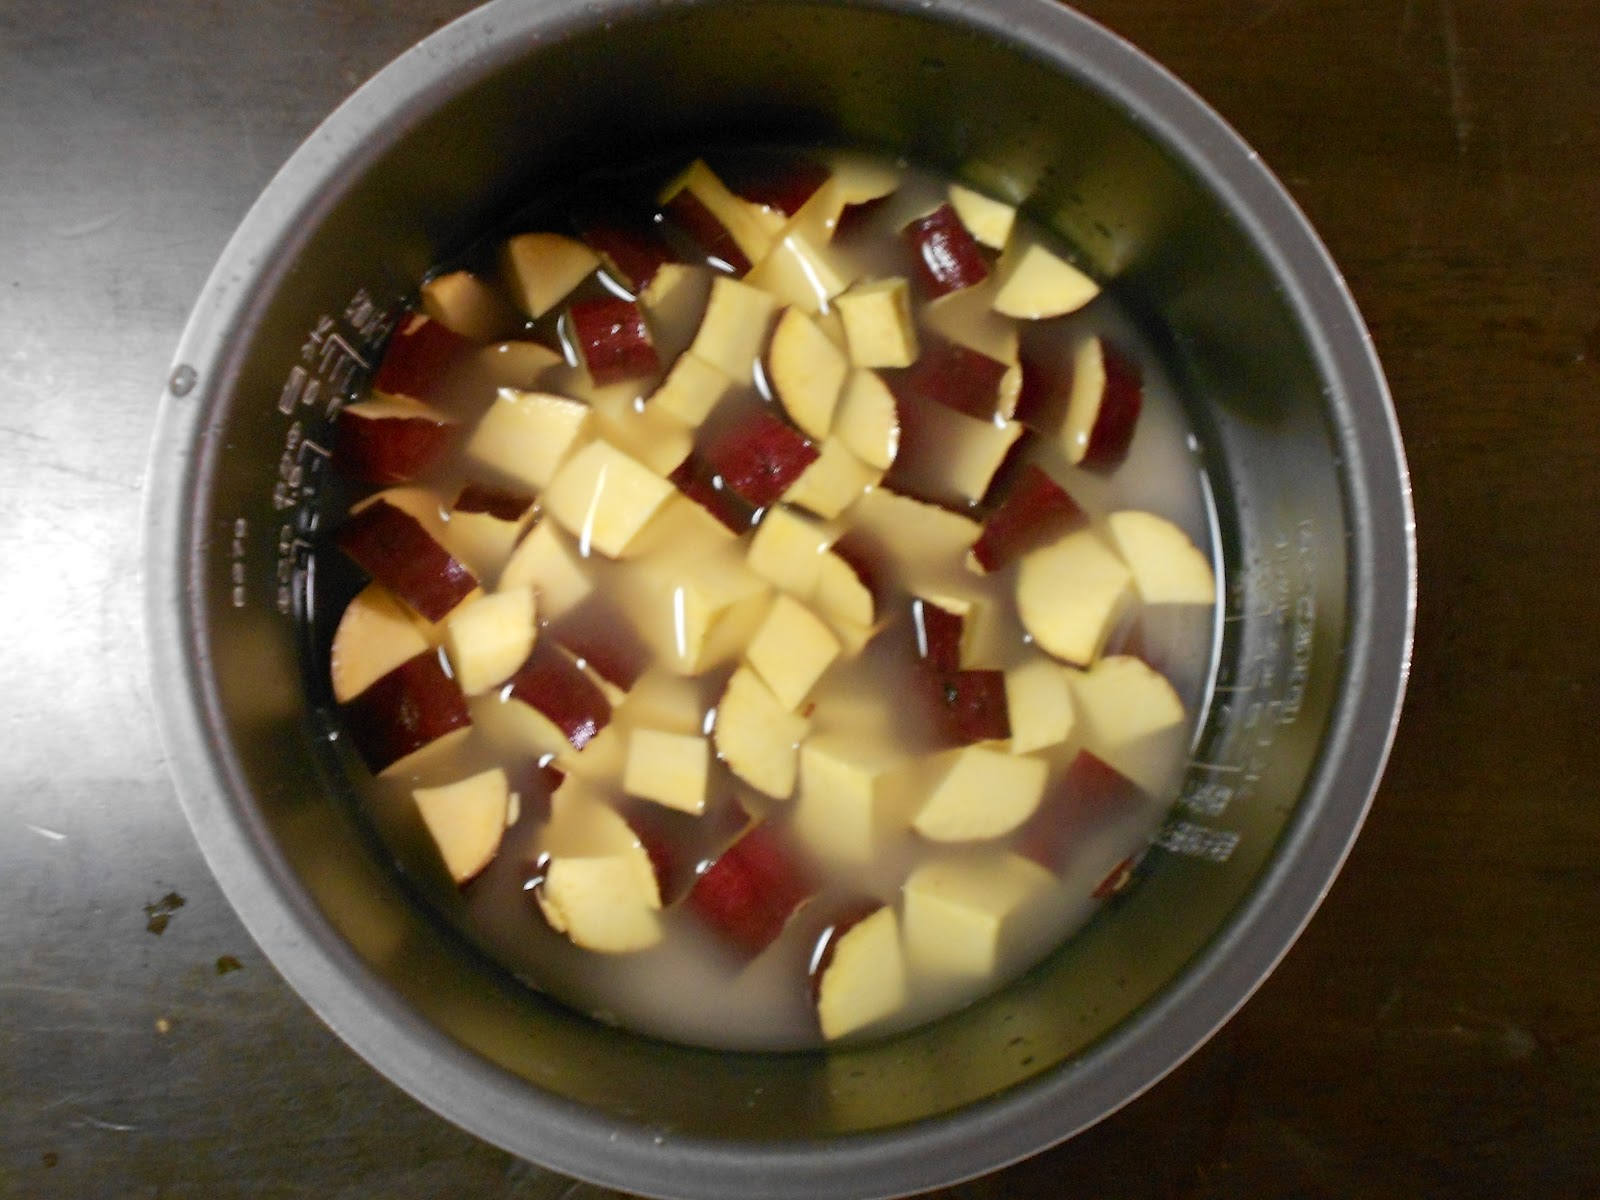
Wash the sweet potatoes and cut them in small pieces. Put the rice in the rice cooker, and place the sweet potato pieces on them. Add water (just use the amount you would normally use for the amount if rice) and the mirin (3 tbsp) then cook as usual.

Sweet potatoes cut into small pieces
The rice (below, not visible on photo) with potato pieces on top and with water added to cook
When it has finished cooking, divide into two portions and place on a plate or put in your lunch-box. Add sesame seeds on top for the finishing touch (in both look and taste!)

Result when rice cooker has finished cooking
Easy, and delicious!

Satsuma-ima gohan - Sweet potato rice


Wednesday, 4 July 2012

Cold soba with dipping sauce

 Now that is has become July, the weather is getting warmer and warmer in Toyko. We have therefore come to love to eating cold meals, to cool down a little bit from the heat outside. With the more warmer periods yet to come, we expect to grow even more fond of these Japanese cold meals.
This time we want to share a favorite meal of us: cold soba. Soba noodles are buckwheat noodles, and can be eaten both cold and warm. Because we enjoy eating cold soba so much, we searched on the internet to find the recipe for the Japanese cold dipping sauce (Kaeshi) that is normally served with cold soba. Turned out: it is very easy to make and very tasty!
 
Making the dipping sauce (Kaeshi)

Ingredients (makes several portions, can be stored in refrigerator)
  • 2 cups soja
  • 1/3 cup mirin
  • 1/4 cup sugar
 Put the 1/3 cup mirin in a pan, and bring to boil. Lower the temperature, so it can simmer for a little bit. Then add the 1/4 cup sugar (if you prefer a more sweeter sauce, you can try adding more sugar), and stir until all the sugar is melted. Finally, add the 2 cups of soya sauce and let the sauce warm up. When it starts boiling, take is off the heat.
Let is cool down, and then store it in the refrigerator. It will make several portions, but put in a airtight container it can be stored for quite some time.
Put the sauce in a small cup, so you can dip the noodles in.


Making the soba

Ingredients (2p:)
  • 200 gr. soba (will normally be packed in 1-persons portions of 100 gram so very easy!)
Making cold soba noodles is really easy (maybe that's why we like this meal so much?). Put water in a pan and bring to boil. Then, carefully add the soba noodles to the pan, and divide them in the water. Let the noodles boil for the amount of time as indicated on the label (probably around 5 or 6 minutes).
Now comes the most important part of cooking soba noodles. After it's done cooking, you need to wash the noodles thoroughly in cold water. After that it's ready to serve.


Traditionally we see cold soba served on beautiful bamboo plates/mats, but since we don't have those we just use our basic plates. Still tastes good!


Wednesday, 20 June 2012

Okayu

Recently we discovered some new functions on our (already so useful) rice cooker. We can now use it to make even more recipes in a very quick and easy way!
The recipe we want to share today is Okayu, or Japanese rice porridge. We found it is incredibly easy to make using the 'おかゆ'-setting (okayu), or porridge-setting for international cookers. This traditional Japanese recipe is usually made by parents to give to their children when they are sick. However, adults also make it for themselves when they feel under the weather. The porridge can also be eaten as a Japanese-style breakfast, and we have found it makes a very good start of the day.
Right now we are studying for our Japanese tests and we like to make this recipe to eat while studying. It makes for a nice, filling meal: gives you energy but easy to digest.

Ingredients (2p):
(for basic okayu, lots of variations possible!)

  • 1 cup rice
  • 5 cups water
Wash the rice thoroughly and put it in the rice cooker, then add 5 cups of water. Put the rice cooker on 'okayu'-setting and just turn on.
From our experience it takes our cooker approximately 1 hour to finish cooking. However for the best result and taste, it is better to let the rice (when the rice has finished cooking) stand for a while in the still warm rice cooker. When we make this recipe for breakfast, we turn the rice cooker on before we go to sleep, so when we wake up it is finished and ready to eat!
Then, just divide it into two cups and enjoy! This time we added a little sugar on top, to give it a little sweetness.

Japanese Okayu
There are lots of great variations possible for this recipe, we keep trying and experimenting with different ingredients and toppings, and will share our results later!

Monday, 18 June 2012

Simmered daikon

Daikon is a big white, but mildly flavoured, Japanese radish. It actually looks like a big, white carrot, and Daikon literary means 'big root' in Japanese. We had actually no experience at all cooking with radish, so even though we saw Daikon for sale at all supermarkets we had never bought one. We didn't know what to do with it. Eat it raw? cook, fry or broil? However, we were feeling experimental and wanted to try something new. So we bought a daikon and tried some daikon recipes we heard taste very good. And indeed, we have come to love daikon

One (very big) daikon
This time we want to share a favourite daikon recipe of ours, Japanese Simmered Daikon. This recipe makes for a great side dish, but is also nice to be enjoyed as a warm snack on cold winter days.

Daikon is apparently really healthy, and we heard it is even a great remedy against hangovers! We haven't tried it ourselves, but please let us know if you find this actually works.

Ingredients (2p):

1/2 daikon
1 tbsp dashi powder
1 tbsp mirin
2 tbsp soya sauce

First, peel the skin off the daikon and slice it to pieces of approximately 1 cm thickness. Then, cut these pieces to quarters.


Daikon cut to pieces
Fill a fry pan with approximately 0,75 cm water, and mix the water with the dashi powder (1 tbsp), mirin (1 tbsp) and soya sauce (2 tbsp). Put on the heat, and bring it to boil.
Then, add the daikon pieces to the pan, and divide evenly on the water. Lower the heat, and cover the pan with a lid and let it simmer for about 30 minutes. After 15 minutes you can turn the daikon pieces, so both sides simmer evenly.

Daikon pieces added to the pan
Simmer with lid
 After about 30 minutes (or when all the water in the pan is gone) your simmered daikon is ready!

Finished simmered daikon (no water left)
 Serve and enjoy!

Japanese simmered daikon

You can view the cooking process on our youtube channel!


Saturday, 9 June 2012

Oyakodon (Chicken-and-egg rice)

 This time we made a dish with a really interesting name: Oyakodon. It means parent-child rice bowl because it uses both the chicken and the egg. Although the recipe sounds like something Hannibal Lecter would eat, it actually tastes really good!

The recipe comes from our Japanese language book 'Minna no Nihongo' and is used to show how you can say 'do this according to these instructions'. Good students as we are, we took that literally and started cooking straight away. Though the basics are still 'Minna no Nihongo'-style, we made some slight improvements in the ingredient ratios. This dish is really easy to make, very low in fat and super tasty. Kids love it and parents too ;). Oh, and it has the coolest name ever!

What do we need?

Ingredients (2p):
  • Rice for 2 persons
  • 250 ml water
  • 1 tblsp dashi
  • 3,5 tblsp soy sauce
  • 2 tblsp mirin
  • 1,5 tblsp sugar
  • 1 chicken filet
  • 1 onion
  • 2 eggs
First cut the chicken in thin long strips. Then cut the onion in wedges. To make wedges you first cut the onion horizontally in half and then cut each half in quarters (or just chop the onion up :-P).

The chicken and onion cut into pieces
Then mix the water, dashi, soy sauce, mirin and sugar and pour the mixture into a preferably small fry pan. Bring to a boil and add the chicken and onion. Both should be covered in liquid. Now bring down the heat to a simmering. After 6-7 minutes your broth should be ready but make sure the chicken is thoroughly cooked.


The chicken and onion simmering in the dashi-mixture

Beat two eggs and pour them evenly over the simmering broth. Put a lid on the frying pan and let nature take its course for 2 minutes.

Two beaten eggs divided over the simmering broth, cover with lid
In the meanwhile you can put the rice in your bowls. Uncover the frying pan, divide the broth and onions onto the bowls and put the chicken with egg on top of the rice. You are now ready to go Hannibal Lecter!

Video review:


End result:

Thursday, 31 May 2012

Frozen Matcha Yoghurt

This is a great Japanese dessert, delicious for warm summer evenings. It's easy to prepare, but will need some time in de freezer, so plan ahead and start in the afternoon if you want to make it for dessert.

Ingredients (2p):
  • 250 ml yoghurt
  • 1,5 tbsp matcha powder
  • 5 tbsp sugar
You can adjust the amount of matcha to your liking, and add a little more or less depending on how strong you want the matcha taste to be.

Preparation:

Add the 250 ml yoghurt and 1,5 tbsp of matcha powder in a bowl and mix together. Add the 5 tbsp sugar, and make sure everything is mixed together, using a hand-held whisker or mixer. When it is mixed, cover it with plastic, and put it in the freezer for approximately 3 hours.

The yoghurt mixed with matcha powder and sugar

After those three hours, remove it from the freezer, and whisk it together till it is creamy. Then, cover it up again and put it in the freeze for another hour.

After one hour, remove the frozen yoghurt from the freezer, and serve in two cups. Enjoy!

We filmed the preparation-process to make it even easier to prepare:


The frozen matcha yoghurt, ready to be served as dessert

Tuesday, 29 May 2012

Omelet Rice (Omurice)

 
A recipe that is very popular with kids (and with us!) is omurice (オムライス) or Omelet Rice. We usually eat it for lunch but since it's quite a filling meal you can also prepare it for dinner. Like the name suggests, this recipe is a fusion between an omelet and rice. The distinctive presentation style makes it an icon of Japanese cooking, and it looks pretty cool too! It takes about 15-20 minutes in the kitchen and you only need a little skill to make it look really good. So where do we start?

Ingredients (2p):
  • Any mix of vegetables you like, this time we used:
    • 1 small broccoli
    • 4 big mushrooms (shiitake)
    • carrot
  • white rice for 2 persons (normally; 1 cup of rice makes 2 servings) 
  • ketchup  
  • For the omelets:
    • 1 tbsp soy sauce 
    • 2 tbsp mirin
    • 1 tbsp sugar
    • 4 eggs
Omelet Rice can be made with al kind of ingredients and you can experiment with different vegetables. It is very good meal to use some left-over vegetables from you refrigerator! We like to eat this meal vegetarian, but you can easily change that and add chicken to ingredients. Feel free to do whatever you like but keep in mind that all has to fit in your egg roll in the end :).

Preparation:

Prepare the white rice in your cooker or pan. The rice will be fried afterwards so make sure it's not too sticky or wet. Cut your vegetables and boil the broccoli and carrots for +/- 5 minutes (or other vegetables you use that need boiling to prepare).

2/3 of the carrot was already boiling, but this should give you an idea of how much ingredients you need
When the broccoli and carrots are almost done, heat some oil in the frying pan and fry the mushrooms. (Here you can substitute for other vegetables or chicken) Pour off your boiled vegetables and add them to the mushrooms. Stir fry for 2-3 minutes then put it on low heat while you prepare the omelet.


Put 4 eggs in a cup and add 2 tblsp mirin, 1 tblsp soy sauce and 1 tbsp of sugar. Be careful not to add more because your omelet might become to thin. The mirin gives the omelet a nice even light yellow color, while soy sauce adds a little salty taste and the sugar makes it a little sweet. Stir and divide into two portions

Of course, if you find this too much of a hassle you can leave the mirin, soy sauce and sugar out, and just make a normal omelet. However, we do think the taste of the original omelet does give this recipe that little extra to enjoy!

The omelet with soy sauce and mirin

 Now it's time to add the rice and ketchup to the vegetables and mix together, stir fry for 2-3 minutes.

Add ketchup to your own taste

Presentation

Step 1: To present the omurice in the typical Japanese way, put the edge of the omelet in the middle of the plate.

Edge of the omelet is in the middle of the plate
  
Step 2: fold the omelet and put some more ketchup on top.


Step 3: enjoy!