Daigaku-imo is recipe made with Japanese sweet potatoes (satsuma-imo), that have been given a sweet caramelized taste. The name of the recipe literary means 'university potato'. Originally this was a recipe that was popular among university students, because it is a cheap, sweet recipe full of calories. And I have to agree, it is a great snack (or meal) to eat when you are studying all day for your next test.
It's pretty easy to make. Which student would want to spend a long time in the kitchen while you need that time to study anyway?
Ingredients (circa 2p):
1 Sweet potato (Satsuma-imo)
1 tbsp soy sauce
2 tbsp sugar
50ml water
Originally, most recipes call for more sugar and less water. We prefer it this way: sweet, but not overly sweet; and easier to make since you don't have the risk of the sugar caramelizing too fast and getting hard before it is on the potatoes.
Cut the potato into small, bite-size pieces. Heat some oil in a fry-pan and bake the potatoes till they are soft.
Mix the soy sauce, sugar and water together and heat in a small saucepan.
When it starts simmering, add the potato-pieces in the saucepan. The saucepan will now be really full, no problem, you just have to stir really well so that the sugar-mixture will attach to all potato-pieces.
When all of the sugar-mixture has been attached to the potato-pieces, you put off the heat, and serve the daigaku-imo. Put them on a plate and sprinkle with sesame seeds.
It tastes good warm, so perfect as a side dish. But it also tastes good cold, so make some extra and put the rest in your bento-box (for when you are studying at the library the next day ;)
One of our favourite Japanese meals is Okonomiyaki: Japanese pancake or Japanese pizza, or maybe more like Japanese omelet. No matter how you describe it, Okonomiyaki is delicious!
There are many variations in the Okonomiyaki recipe, the two main 'styles' come from two different regions in Japan: Osaka style & Hiroshima style. When we were travelling through Japan we took the opportunity to try both styles in their original area. And both are insanely delicious. Basically, Osaka style mixes all the ingredients together in one think pancake, while Hiroshima style cooks the ingredients in different layers on top of each other and adds some noodles to the recipe. Then there are endless variation on filling of your okonomiyaki: beef, pork, shrimp and/or other seafood, etc. You can try many differences!
This time we will share our recipe of the Osaka style Okonomiyaki: all mixed together to form on big pancake. We decided to make it a shrimp okonomiyaki, but fill free to substitute that with other ingredients you like.
Ingredients (2p):
100 gr flour
160 ml water mixed with dashi powder
2 eggs
300 gr cabbage
For the filling (can be substituted for other flavours):
150 gr shrimps
For topping:
(Kewpie) mayonnaise
Okonomiyaki sauce (or you can use Tonkatsu sauce or Worcester sauce)
Bonito flakes (Katsuobushi)
The video guide:
Mix the flour, dashi-water and eggs together.
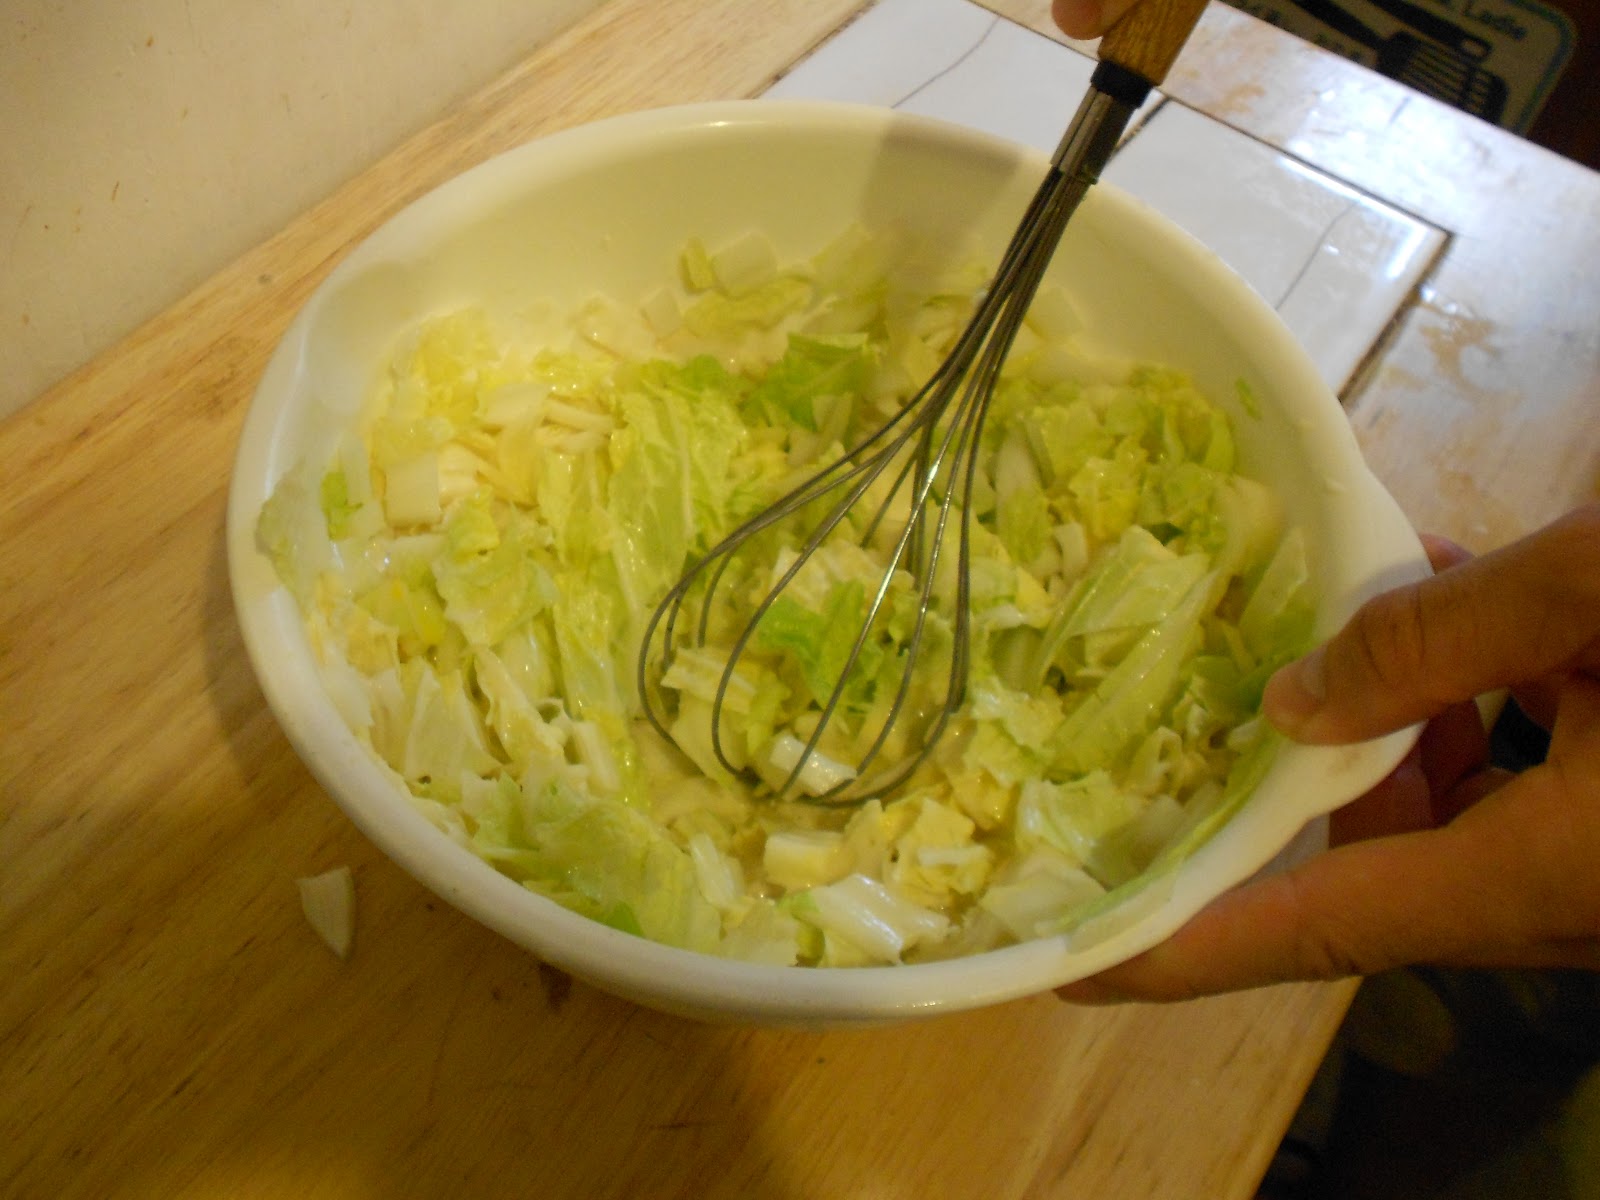
Cut the cabbage in small long pieces (approximately 3 cm by 0,5 cm).
Add the slices cabbage to the batter and mix together.
Add shrimps, and mix together.
Heat some oil in a small fry-pan, divide the Okonomiyaki-batter in two portions and put the first portion in the fry-pan. Do the shaping on low fire and make sure the ingredients are well spread over the pancake/omelet. Bake on medium fire until it becomes a firm structure (takes about 6-8 minutes).
Then comes the hard part: turning it over. You can try doing it how it is supposed to be: flipping it over with a big spatula. It never really works for us. We end up with lots of small disintegrated pieces of Okonomiyaki. Therefore, we found a perfect, and easy way. Take another fry-pan, and just turn the okonomiyaki over into this other fry-pan. Much easier. (see our video for clear instructions)
You can start using the first fry-pan to make the second Okonomiyaki.
When it has finished cooking, put it on a plate.
Add mayonnaise and Okonomiyaki-sauce (preferably in pretty looking stripes or other shapes :)
We have found a new way to use our rice cooker: to make cake! We love the easiness and convenience of the rice cooker for cooking many delicious meals, and we love cake, so combining the two is perfect. It makes a delicious, and very easy to make cake!
We now have summer vacation from school, so lots of time to experiment with making different kind of cakes, and just in time so we can eat them for our birthdays :)
Making cake in the rice cooker is truly very easy and fast, and the taste of the cake is great. We will share our favourite recipe to make cake from the rice cooker, plain cake or easily converted to make chocolate cake (our absolute favourite taste)
Piece of chocolate cake, topped with extra chocolate sauce
Ingredients (makes a cake with approximately 19cm diameter, and 3 cm height):
125 gr flour
2 eggs
1 tbsp sugar
50 ml (coleseed) oil
100 ml milk
1 tsp baking powder
For chocolate cake: add chocolate powder or syrup to taste
Mix the flour, eggs, sugar, oil, milk, and baking powder together until the batter is smooth. For the chocolate-cake you can now add the chocolate powder or chocolate syrup, and mix with the batter.
Mixing the batter
Adding chocolate syrup
Chocolate cake batter in the rice cooker pan
Put the batter in your rice cooker. No need to grease the rice cooker-pan, it already has (should have) a very good anti-stick layer and the cake will come out easily. Put the rice cooker on cake-modus, and turn on for 30 minutes.
Our rice cooker has a cake option in the menu, which will ask for the amount of time you want to cook your cake. All rice cookers are probably different, so check the options in the manual. Apparently, you may even be able to make cake in a rice cooker with only an on-button, but we haven't tried that so we can't say anything about it.
Finished rice cooker cake
After the rice cooker has finished, wait until the pan and the cake has cooled down. Then you can turn over the pan and with a little shake the cake will come out perfectly. (Something we have experienced as much harder when you bake cake to traditional way in the oven!)
Rice cooker cake, ready to eat!
Top it with some whipped cream, chocolate sauce, jelly, or just enjoy plain!
Recently we discovered some new functions on our (already so useful) rice cooker. We can now use it to make even more recipes in a very quick and easy way!
The recipe we want to share today is Okayu, or Japanese rice porridge. We found it is incredibly easy to make using the 'おかゆ'-setting (okayu), or porridge-setting for international cookers. This traditional Japanese recipe is usually made by parents to give to their children when they are sick. However, adults also make it for themselves when they feel under the weather. The porridge can also be eaten as a Japanese-style breakfast, and we have found it makes a very good start of the day.
Right now we are studying for our Japanese tests and we like to make this recipe to eat while studying. It makes for a nice, filling meal: gives you energy but easy to digest.
Ingredients (2p):
(for basic okayu, lots of variations possible!)
1 cup rice
5 cups water
Wash the rice thoroughly and put it in the rice cooker, then add 5 cups of water. Put the rice cooker on 'okayu'-setting and just turn on.
From our experience it takes our cooker approximately 1 hour to finish cooking. However for the best result and taste, it is better to let the rice (when the rice has finished cooking) stand for a while in the still warm rice cooker. When we make this recipe for breakfast, we turn the rice cooker on before we go to sleep, so when we wake up it is finished and ready to eat!
Then, just divide it into two cups and enjoy! This time we added a little sugar on top, to give it a little sweetness.
Japanese Okayu
There are lots of great variations possible for this recipe, we keep trying and experimenting with different ingredients and toppings, and will share our results later!
This time we made a dish with a really interesting name: Oyakodon. It means parent-child rice bowl because it uses both the chicken and the egg. Although the recipe sounds like something Hannibal Lecter would eat, it actually tastes really good!
The recipe comes from our Japanese language book 'Minna no Nihongo' and is used to show how you can say 'do this according to these instructions'. Good students as we are, we took that literally and started cooking straight away. Though the basics are still 'Minna no Nihongo'-style, we made some slight improvements in the ingredient ratios. This dish is really easy to make, very low in fat and super tasty. Kids love it and parents too ;). Oh, and it has the coolest name ever!
What do we need?
Ingredients (2p):
Rice for 2 persons
250 ml water
1 tblsp dashi
3,5 tblsp soy sauce
2 tblsp mirin
1,5 tblsp sugar
1 chicken filet
1 onion
2 eggs
First cut the chicken in thin long strips. Then cut the onion in wedges. To make wedges you first cut the onion horizontally in half and then cut each half in quarters (or just chop the onion up :-P).
The chicken and onion cut into pieces
Then mix the water, dashi, soy sauce, mirin and sugar and pour the mixture into a preferably small fry pan. Bring to a boil and add the chicken and onion. Both should be covered in liquid. Now bring down the heat to a simmering. After 6-7 minutes your broth should be ready but make sure the chicken is thoroughly cooked.
The chicken and onion simmering in the dashi-mixture
Beat two eggs and pour them evenly over the simmering broth. Put a lid
on the frying pan and let nature take its course for 2 minutes.
Two beaten eggs divided over the simmering broth, cover with lid
In the
meanwhile you can put the rice in your bowls. Uncover the frying pan,
divide the broth and onions onto the bowls and put the chicken with egg
on top of the rice. You are now ready to go Hannibal Lecter!
A recipe that is very popular with kids (and with us!) is omurice (オムライス) or Omelet Rice. We usually eat it for lunch but since it's quite a filling meal you can also prepare it for dinner. Like the name suggests, this recipe is a fusion between an omelet and rice. The distinctive presentation style makes it an icon of Japanese cooking, and it looks pretty cool too! It takes about 15-20 minutes in the kitchen and you only need a little skill to make it look really good. So where do we start?
Ingredients (2p):
Any mix of vegetables you like, this time we used:
1 small broccoli
4 big mushrooms (shiitake)
carrot
white rice for 2 persons (normally; 1 cup of rice makes 2 servings)
ketchup
For the omelets:
1 tbsp soy sauce
2 tbsp mirin
1 tbsp sugar
4 eggs
Omelet Rice can be made with al kind of ingredients and you can experiment with different vegetables. It is very good meal to use some left-over vegetables from you refrigerator! We like to eat this meal vegetarian, but you can easily change that and add chicken to ingredients. Feel free to do whatever you like but keep in mind that all has to fit in your egg roll in the end :).
Preparation:
Prepare the white rice in your cooker or pan. The rice will be fried afterwards so make sure it's not too sticky or wet. Cut your vegetables and boil the broccoli and carrots for +/- 5 minutes (or other vegetables you use that need boiling to prepare).
2/3 of the carrot was already boiling, but this should give you an idea of how much ingredients you need
When the broccoli and carrots are almost done, heat some oil in the frying pan and fry the mushrooms. (Here you can substitute for other vegetables or chicken) Pour off your boiled vegetables and add them to the mushrooms. Stir fry for 2-3
minutes then put it on low heat while you prepare the omelet.
Put 4 eggs in a cup and add 2 tblsp mirin, 1 tblsp soy sauce and 1 tbsp of sugar. Be careful not to add more because your omelet might become to thin. The mirin gives the omelet a nice even light yellow color, while soy sauce adds a little salty taste and the sugar makes it a little sweet. Stir and divide into two portions
Of course, if you find this too much of a hassle you can leave the mirin, soy sauce and sugar out, and just make a normal omelet. However, we do think the taste of the original omelet does give this recipe that little extra to enjoy!
The omelet with soy sauce and mirin
Now it's time to add the rice and ketchup to the vegetables and mix together, stir fry for 2-3 minutes.
Add ketchup to your own taste
Presentation
Step 1: To present the omurice in the typical Japanese way, put the edge of the omelet in the middle of the plate.
Edge of the omelet is in the middle of the plate
Step 2: fold the omelet and put some more ketchup on top.