Now that is has become autumn, and with Halloween getting near, we just had to make some pumpkin recipes! We still love our Kabocha cookies recipe, but we also wanted to try some new recipes. This time, we tried 'simmered kabocha'.
Ingredients (2p):
1/2 kabocha (Japanese pumpkin)
circa 180 ml water
2 tbsp sugar
2 tbsp soy sauce
Cut the kabocha into small cubes.
In a pan, mix together the water, soy, and sugar and bring to boil. When it boils, add the pumpkin pieces and turn down the heat. Now let the pumpkin simmer for about 15 minutes.
Serve with rice for a light lunch, or eat as a side dish. This dish has a perfect taste for cold autumn days.
Kitsune Udon literary means "Fox Udon". According to old folk-tales, the favourite food of foxes (kitsune) is 'aburaage': fried tofu, which is the topping of this recipe!
Many area's in Japan are famous for their servings of Kitsune Udon. For example, the area around Fushimi Inari shrine in Kyoto. Fushimi Inari is dedicated to Inari, the shinto god of rice and
business. His messengers are foxes (kitsune) of which there are many
statues all over the mountain. Most of the foxes are depicted with a
granary key in their mouth, a symbolic key to success and prosperity.
Though their boss is the god of rice, the foxes are more into tofu. We visited Fushimi Inari Shrine last June, and off course we tried some Kitsune Udon!
Fox next to the torii gates by Fushimi Inari
Because we really liked the kitsune udon, we wanted to make it ourselves too!
Ingredients (2p):
For the udon-soup:
2 packs of Udon (are normally sold in packs of 3)
circa 700 ml water
dashi powder (out brand required 2,5 tbsp of dashi powder for 700 ml water to make udon soup, but check the box to see the amount needed)
2 tbsp soy sauce
2 tbsp mirin
2 tbsp sugar
For the topping:
Aburaage*
Naruto-maki (fish cake, in long round shape), cut into thin slices
* You can (apparently) make the Aburaage yourselves. However, we have never tried that and just go for the easy way: store-bought Aburaage. You can just buy the same tofu as is used for inari-sushi.
How to make video...
.. or the instructions:
Mix the dashi-powder with 700 ml water. While bringing up the heat, add the soy sauce, mirin and sugar.
When it gets to simmer, add the udon noodles and let it cook for about 3-4 minutes.
In the meanwhile, get the aburaage out of the packing, and cut the naruto-maki into slices.
Slices of Naruto-maki
Divide the noodles and soup in two bowls, and top with the aburaage and naruto. Enjoy!
One of our favourite Japanese meals is Okonomiyaki: Japanese pancake or Japanese pizza, or maybe more like Japanese omelet. No matter how you describe it, Okonomiyaki is delicious!
There are many variations in the Okonomiyaki recipe, the two main 'styles' come from two different regions in Japan: Osaka style & Hiroshima style. When we were travelling through Japan we took the opportunity to try both styles in their original area. And both are insanely delicious. Basically, Osaka style mixes all the ingredients together in one think pancake, while Hiroshima style cooks the ingredients in different layers on top of each other and adds some noodles to the recipe. Then there are endless variation on filling of your okonomiyaki: beef, pork, shrimp and/or other seafood, etc. You can try many differences!
This time we will share our recipe of the Osaka style Okonomiyaki: all mixed together to form on big pancake. We decided to make it a shrimp okonomiyaki, but fill free to substitute that with other ingredients you like.
Ingredients (2p):
100 gr flour
160 ml water mixed with dashi powder
2 eggs
300 gr cabbage
For the filling (can be substituted for other flavours):
150 gr shrimps
For topping:
(Kewpie) mayonnaise
Okonomiyaki sauce (or you can use Tonkatsu sauce or Worcester sauce)
Bonito flakes (Katsuobushi)
The video guide:
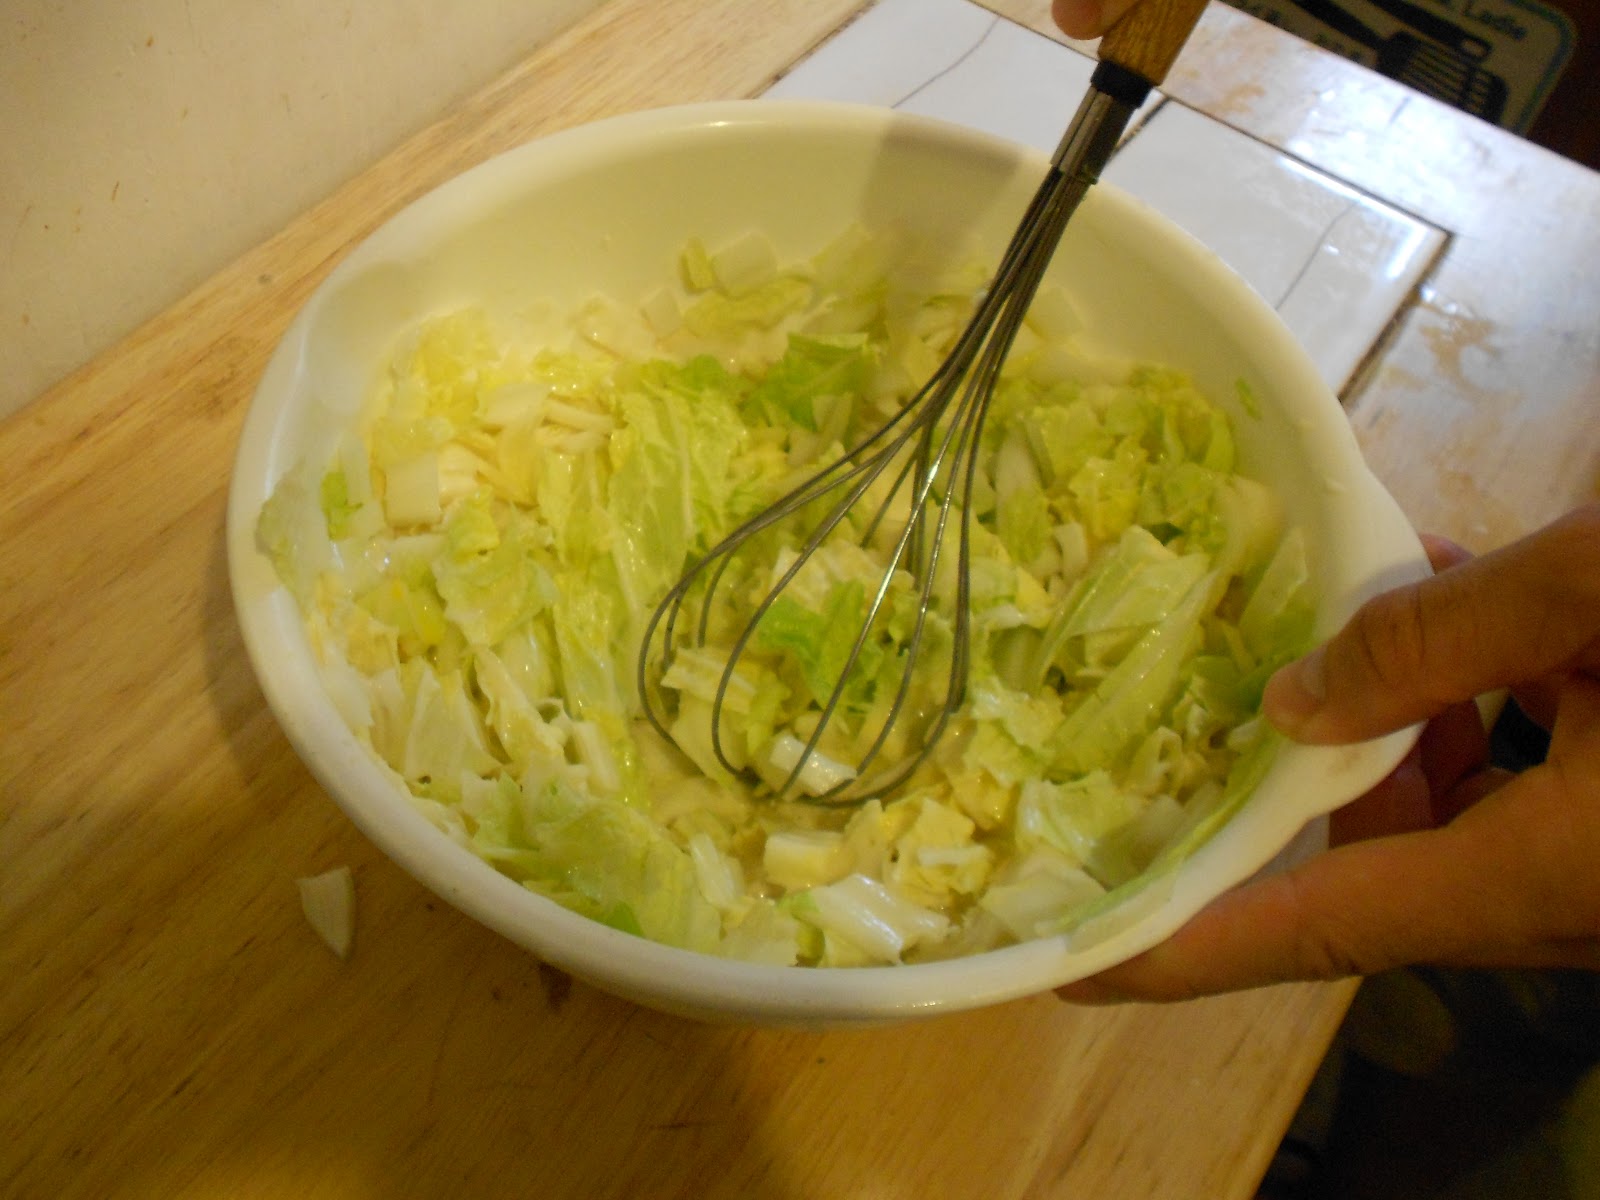
Mix the flour, dashi-water and eggs together.
Cut the cabbage in small long pieces (approximately 3 cm by 0,5 cm).
Add the slices cabbage to the batter and mix together.
Add shrimps, and mix together.
Heat some oil in a small fry-pan, divide the Okonomiyaki-batter in two portions and put the first portion in the fry-pan. Do the shaping on low fire and make sure the ingredients are well spread over the pancake/omelet. Bake on medium fire until it becomes a firm structure (takes about 6-8 minutes).
Then comes the hard part: turning it over. You can try doing it how it is supposed to be: flipping it over with a big spatula. It never really works for us. We end up with lots of small disintegrated pieces of Okonomiyaki. Therefore, we found a perfect, and easy way. Take another fry-pan, and just turn the okonomiyaki over into this other fry-pan. Much easier. (see our video for clear instructions)
You can start using the first fry-pan to make the second Okonomiyaki.
When it has finished cooking, put it on a plate.
Add mayonnaise and Okonomiyaki-sauce (preferably in pretty looking stripes or other shapes :)
Gyudon is a very popular dish in Japan. You can get a standard bowl for about 380 yen at one of the big chains in almost every street in Japan. Since these restaurants are often open 24 hours, it is a dish not only popular for people seeking a fast an cheap meal, but also a popular midnight snack for those coming back from late work or drinking.
Gyu means 'cow', and 'don' means (rice) bowl, so it's a recipe for rice topped with (simmered) beef, served with a mildly sweet sauce and unions, and often topped with pickled ginger. Although the Gyudon shops will mostly be considered selling 'fastfood', it is actually a quite healthy meal. But, of course we do not always want to eat out when we feel like eating gyudon, so we searched for ways to prepare it ourselves. Very easy, and tastes just as good (or even better!) than the Gyudon served in the numerous gyudon-shops. And much cheaper too :).
Ingredients (2p):
Rice for 2 persons
around 250 gram thinly sliced beef
1 onion
200 ml water mixed with 1 tbsp dashi powder
2 tbsp soy sauce
2 tbsp mirin
optional for topping: ginger and sesame seeds. Usually benishoga (pickled red ginger) is used, however, we prefer to use fresh grated ginger as topping.
First, cut the onion in wedges and cut the beef in thinly, slim slices. And cook the rice as usual.
Then, is a small fry-pan, mix the dashi-stock (200 ml water mixed with dashi powder) with the soy sauce and the mirin, while bringing it to simmer. Add the onion pieces and let them simmer for a couple of minutes. Lastly add also the beef, mix together with the onions and let the total simmer for a couple minutes until the beef has gained it's light-brown colour.
Simmering the onion wedges
Mixing in the beef
Divide the rice into two bowls, and add the beef-onion and sauce on top. Now for topping, grate fresh ginger (feel free to just use the more traditional pickled red benishoga) and add on top and spread some sesame seeds.
Home-made Gyudon
You have made your own bowl of gyudon, no need to visit the Gyudon restaurants anymore. Enjoy!
Our school has started again, so we spend our days in the classroom and/or in the library. This means that we normally don't have time to eat lunch at home. Therefore, we bought some nice lunch-chopsticks with holders, and have started making a lot of bento-meals. So, from now we will probably start sharing some of our favourite take-with-us recipes.
Usually we prepare these meals before we go to school, so they have to be real easy and quick to make. This recipe, Satsuma-imo gohan or sweet potato rice, is exactly that. You only need a rice cooker and some time to wait until it is finished cooking.
Satsuma-imo are Japanese sweet potatoes, with a purple skin and yellow-ish inside. It has a really nice, sweet taste. We have even seen (and tasted) it as a ice cream flavour!
Japanese sweet potatoes (Satsuma-imo)
Ingredients (2p):
White rice for 2 persons
2 average sized sweet potatoes
3 tbsp mirin
topping: sesame seeds
We have seen recipes for this meal using different kinds of rice, but since we normally only have plain white style rice we just use that and it tastes good! However, for some variation in taste, you can try making it with (combinations of ) different kinds of rice.
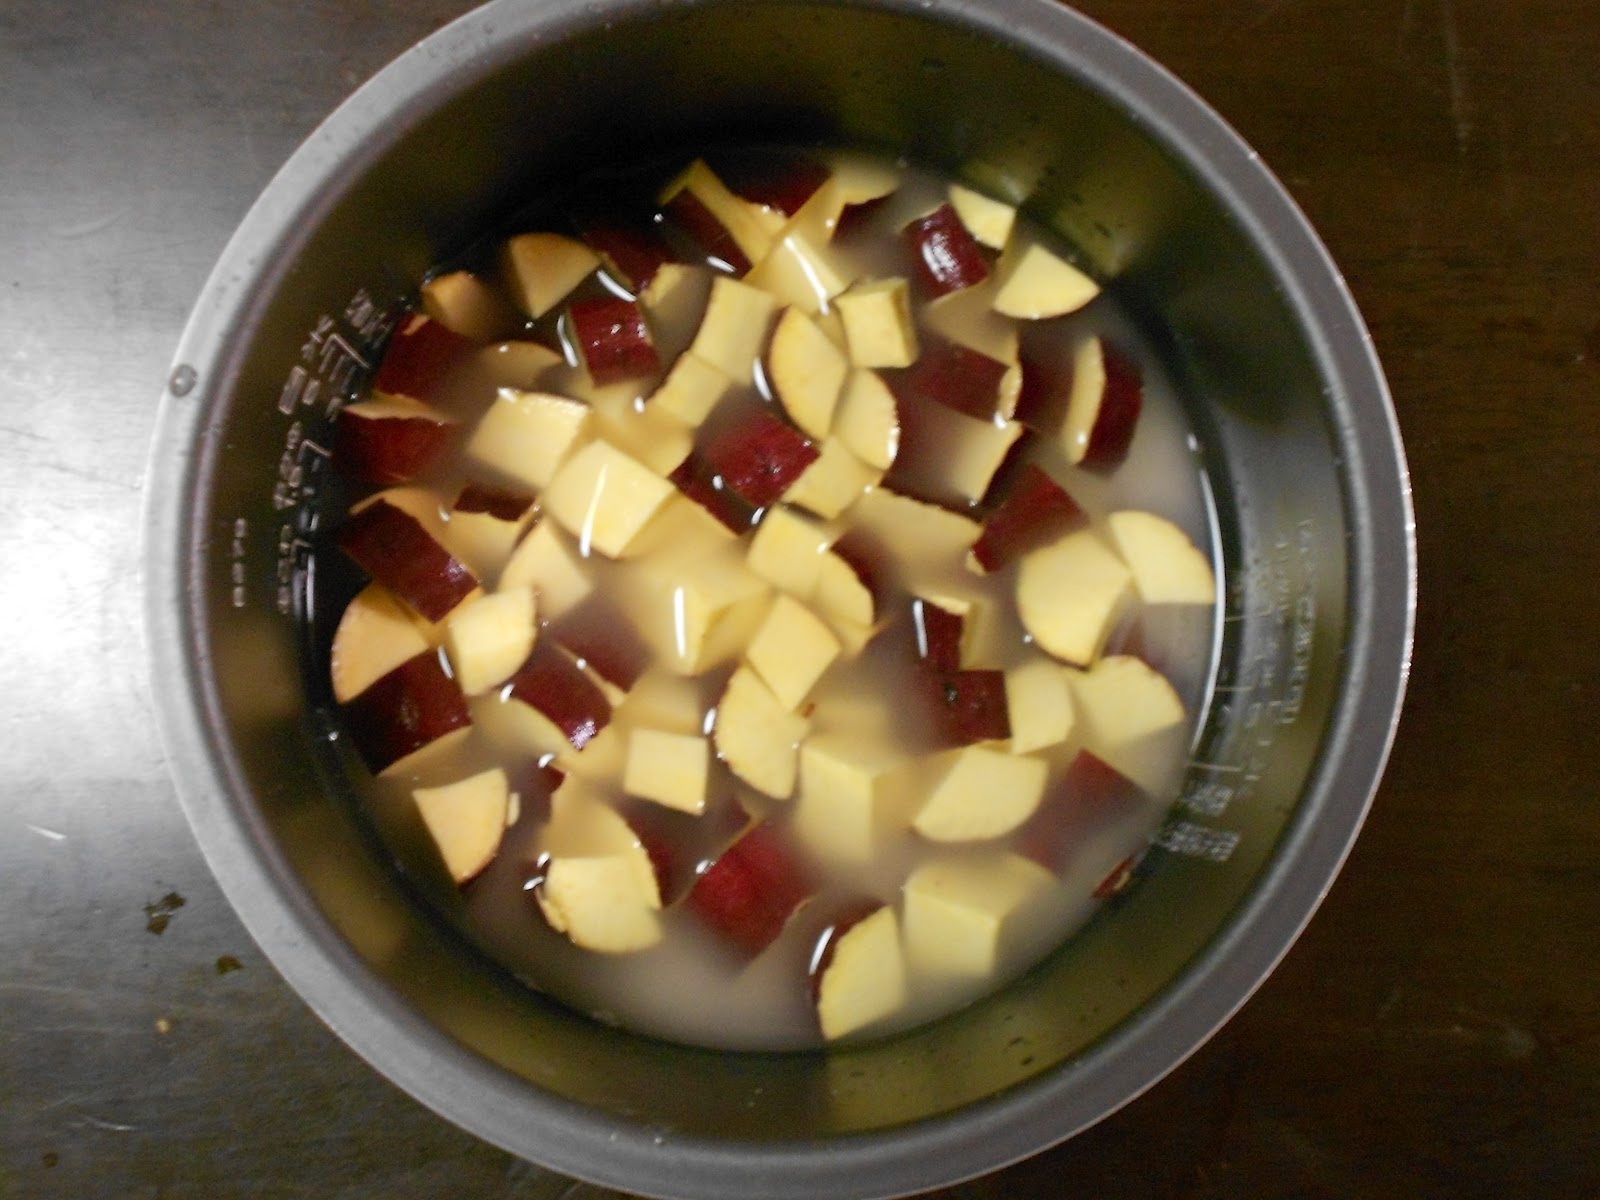
Wash the sweet potatoes and cut them in small pieces. Put the rice in the rice cooker, and place the sweet potato pieces on them. Add water (just use the amount you would normally use for the amount if rice) and the mirin (3 tbsp) then cook as usual.
Sweet potatoes cut into small pieces
The rice (below, not visible on photo) with potato pieces on top and with water added to cook
When it has finished cooking, divide into two portions and place on a plate or put in your lunch-box. Add sesame seeds on top for the finishing touch (in both look and taste!)
Now that is has become July, the weather is getting warmer and warmer in Toyko. We have therefore come to love to eating cold meals, to cool down a little bit from the heat outside. With the more warmer periods yet to come, we expect to grow even more fond of these Japanese cold meals.
This time we want to share a favorite meal of us: cold soba. Soba noodles are buckwheat noodles, and can be eaten both cold and warm. Because we enjoy eating cold soba so much, we searched on the internet to find the recipe for the Japanese cold dipping sauce (Kaeshi) that is normally served with cold soba. Turned out: it is very easy to make and very tasty!
Making the dipping sauce (Kaeshi)
Ingredients (makes several portions, can be stored in refrigerator)
2 cups soja
1/3 cup mirin
1/4 cup sugar
Put the 1/3 cup mirin in a pan, and bring to boil. Lower the temperature, so it can simmer for a little bit. Then add the 1/4 cup sugar (if you prefer a more sweeter sauce, you can try adding more sugar), and stir until all the sugar is melted. Finally, add the 2 cups of soya sauce and let the sauce warm up. When it starts boiling, take is off the heat.
Let is cool down, and then store it in the refrigerator. It will make several portions, but put in a airtight container it can be stored for quite some time.
Put the sauce in a small cup, so you can dip the noodles in.
Making the soba
Ingredients (2p:)
200 gr. soba (will normally be packed in 1-persons portions of 100 gram so very easy!)
Making cold soba noodles is really easy (maybe that's why we like this meal so much?). Put water in a pan and bring to boil. Then, carefully add the soba noodles to the pan, and divide them in the water. Let the noodles boil for the amount of time as indicated on the label (probably around 5 or 6 minutes).
Now comes the most important part of cooking soba noodles. After it's done cooking, you need to wash the noodles thoroughly in cold water. After that it's ready to serve.
Traditionally we see cold soba served on beautiful bamboo plates/mats, but since we don't have those we just use our basic plates. Still tastes good!
A recipe that is very popular with kids (and with us!) is omurice (オムライス) or Omelet Rice. We usually eat it for lunch but since it's quite a filling meal you can also prepare it for dinner. Like the name suggests, this recipe is a fusion between an omelet and rice. The distinctive presentation style makes it an icon of Japanese cooking, and it looks pretty cool too! It takes about 15-20 minutes in the kitchen and you only need a little skill to make it look really good. So where do we start?
Ingredients (2p):
Any mix of vegetables you like, this time we used:
1 small broccoli
4 big mushrooms (shiitake)
carrot
white rice for 2 persons (normally; 1 cup of rice makes 2 servings)
ketchup
For the omelets:
1 tbsp soy sauce
2 tbsp mirin
1 tbsp sugar
4 eggs
Omelet Rice can be made with al kind of ingredients and you can experiment with different vegetables. It is very good meal to use some left-over vegetables from you refrigerator! We like to eat this meal vegetarian, but you can easily change that and add chicken to ingredients. Feel free to do whatever you like but keep in mind that all has to fit in your egg roll in the end :).
Preparation:
Prepare the white rice in your cooker or pan. The rice will be fried afterwards so make sure it's not too sticky or wet. Cut your vegetables and boil the broccoli and carrots for +/- 5 minutes (or other vegetables you use that need boiling to prepare).
2/3 of the carrot was already boiling, but this should give you an idea of how much ingredients you need
When the broccoli and carrots are almost done, heat some oil in the frying pan and fry the mushrooms. (Here you can substitute for other vegetables or chicken) Pour off your boiled vegetables and add them to the mushrooms. Stir fry for 2-3
minutes then put it on low heat while you prepare the omelet.
Put 4 eggs in a cup and add 2 tblsp mirin, 1 tblsp soy sauce and 1 tbsp of sugar. Be careful not to add more because your omelet might become to thin. The mirin gives the omelet a nice even light yellow color, while soy sauce adds a little salty taste and the sugar makes it a little sweet. Stir and divide into two portions
Of course, if you find this too much of a hassle you can leave the mirin, soy sauce and sugar out, and just make a normal omelet. However, we do think the taste of the original omelet does give this recipe that little extra to enjoy!
The omelet with soy sauce and mirin
Now it's time to add the rice and ketchup to the vegetables and mix together, stir fry for 2-3 minutes.
Add ketchup to your own taste
Presentation
Step 1: To present the omurice in the typical Japanese way, put the edge of the omelet in the middle of the plate.
Edge of the omelet is in the middle of the plate
Step 2: fold the omelet and put some more ketchup on top.
The first recipe we want to share with you, is Japanese mushroom rice (Kinoko gohan). We just tried this recipe ourselves last weekend and loved it! It is very easy to make, takes a little preparation time and after that you just wait till you can enjoy a nice meal.
Ingredients (2p):
mushrooms (300 gr)
6 tbsp soja
4 tbsp mirin
white rice for 2 persons (1 cup of rice, makes 2 cups of rice serving)
dashistock (we use instant-dashi powder)
You can use any variation of mushrooms for this recipe. This time we used Bunashimeji and Shiitake, but the recipe tastes very good with different kinds of mushrooms too.
The Bunashimeji (right) and Shiitake (left) used in the Mushroom Rice
Preparation
Cut the mushrooms into smalls pieces and put them in a big bowl. Add the soja (6 tbsp) and mirin (4 tbsp) to the mushrooms and firmly mix together.
The result of the mixed mushrooms with soja and mirin
In the meanwhile, wash the rice as normal. Take the amount of water you will need to cook your rice (This will depend on the rice you are using. Typically, this will be in the ratio 1 cup of rice: 2 cups of water) and mix this with the dashi-powder. We used a small tbsp amount of dashi-powder to get the desired light-brown coloured water.
Put the rice and the dashistock (the result of water mixed with the dashipowder) in the rice cooker. Add the mushroom evenly on top of the rice, and cook the rice as usual. The nice smell of mushrooms will soon fill your kitchen while you're waiting for your meal to finish cooking.
The mushrooms added on top on the rice in the rice cooker
When finished, mix the rice and the mushrooms together and divide on plates. Optionally, it tastes very good seasoned with sesame seeds.
The finished Mushroom Rice, enjoy!
It tasted very good, and makes for a great lunch or light dinner. It's
also very easy to put in a bento (lunch) box, to take with you and enjoy
some place else.
 Now that is has become autumn, and with Halloween getting near, we just had to make some pumpkin recipes! We still love our Kabocha cookies recipe, but we also wanted to try some new recipes.


